
The first order of business was removing some mould lines, the satellite dish and the top quad cannon. The satellite dish was easy as it was wasn't glued into place to begin with. The quad gun however proved problematic. When I got the ship, the gun was damaged, with the lower pair of barrels almost snapped off. Removing the entire gun together with its mounting plate would have been ideal but that proved impossible. The damned piece was well and truly stuck and to remove it I would have had to damage the surrounding area far more than it would be worth. Instead I just cut off the actual gun. This allowed me to repair the barrels and made it easier to paint the model as well.
To round off the ship I covered up one of the open access panels with a short plasticard tube topped with some more plasticard. Looks somewhat like a slotted screw. When researching the ship I noticed this modification while looking at the pictures of the Krayt Fang so I knew I just had to add it.

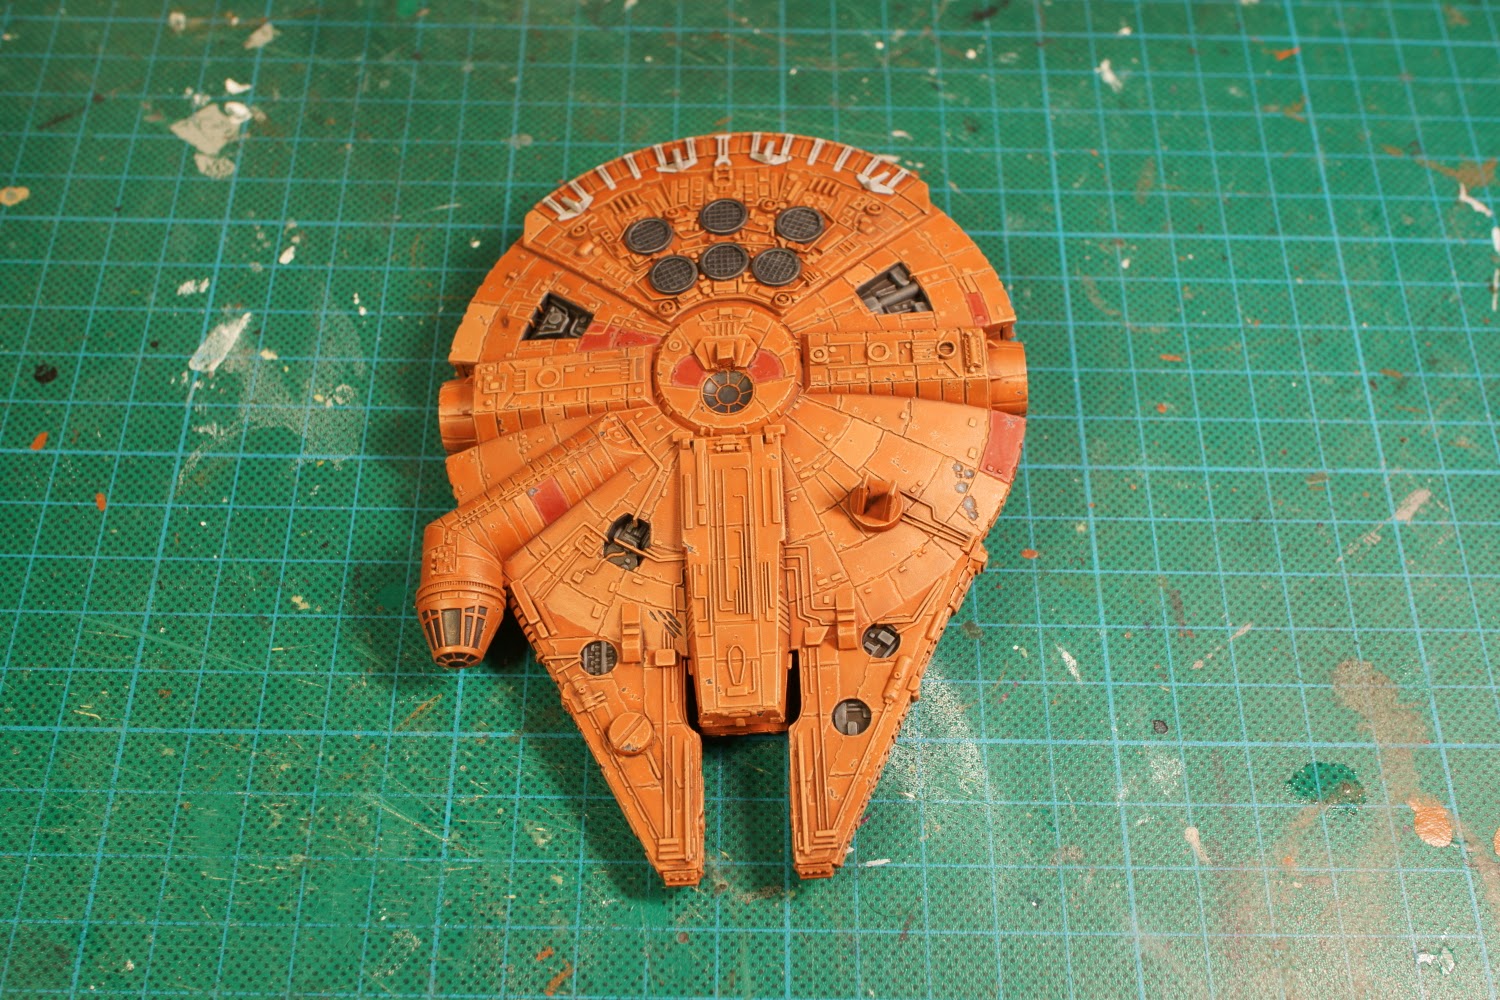
With the pre-painting stage done, I could finally begin painting. Primer was as always first, followed by the base colour, a 1:1 mix of VGC Beasty Brown and VGC Parasite Brown. This was very important to get right as the ship is very explicitly stated to have a "reddish-brown" colour. I sat down before painting and mixed several batches of colours before deciding on the current one.
I also tried something new on this one, pre-shading with the airbrush. I simply added some VGC Terracotta directly into the mixing cup when I was nearing the end and applied to a few areas. It isn't very noticeable but it is something I will try more often. Of course, first I gotta get a better airbrush as the one I've got isn't really accurate and precise enough for this kind of work.

Before shading I picked out the vents on the the top/rear of the ship and the open access panels with a 1:1 mix of VMC German Grey and VMC Chocolate Brown. The windows was painted with pure German Grey and some details around the engine got a coat of VGC Stonewall Grey. I did this so I wouldn't have to redo the wash around those areas again.

The entire ship was washed with a 1:1 mix of Army Painter Strong Tone ink and Dark Tone ink. When it was dry I went back and re-painted the basecoat on any areas where the wash had pooled unevenly. To give the ship some very much needed definition I first drybrushed the ship with a 2:2:1 mix of Beasty Brown, Parasite Brown and VGC Khaki, followed by a lighter drybrush using a 1:2:2 mix of the previously mentioned colours.

I picked out some panels with the mix I used for the second drybrush and some other panels was painted with Terracotta. I also cleaned up the grey details around the engine, and fully painted both the vents and the open access panels.


The main highlight colour was again the same mix as the second drybrush stage. Just about every panel, line and tiny little detail was carefully painted. As a second highlight I made a 2:3 mix of Parasite Brown and Khaki and painted a few of the most pronounced edges. This mix was also used to highlight the brighter panels while a 6:2:1 mix of Terracotta, Khaki and Stonewall grey was used on the red panels.
As you might notice, the highlight is fairly subtle and only done in two stages. With an immensely detailed miniature like this any more highlighting might just take away the focus from the actual model, so I left it at this stage.

I began the weathering stage by sponge chipping most of the model with the main highlight mix. I did take great care to avoid the sides and the top vents. The chips were then filled in with fairly watery German rey. I also highlighted the open access panels and the damaged areas of the ship with several small layers of ever brighter shades of grey.


The top of the model received a lot of dirt streaks and I also dirtied the areas around the open access panels to represent accumulated grime. The bottom got far less streaks as I reasoned that it would just fall off due to gravitational pull rather than collect. To compensate for this I made the the middle, around the turret, fairly dirty, and I also made the open access panels and the landing gear extra dirty.
All of this was achieved by using thinned out Dark Tone ink and painting it in many, many thin layers. I should probably also mention that I painted the landing gear with a 1:1 mix of German Grey and VGC Cold Grey which was highlighted with pure Cold Grey followed by a 1:1 mix of Cold Grey and Stonewall Grey.


As a final touch I brought out my dry pigments to do some additional weathering. The vents and any damaged areas was basically drybrushed/stippled with black pigments while the landing gear and open access panels got a 1:1 mix of black and a Mig powder called Rubble Dust. This gave a very dusty and dirty appearance, but I forgot to exaggerate. Many dry pigments has a tendency to absorb varnish and therefore loose their intended look and more or less 'disappear'. By using more dry pigments than necessary you can compensate for this effect. I forgot about this so I had to redo most of the black/grey mix.


The engine glow was painted with VGC Imperial Blue as a base followed by slowly mixing more and more VGC Magic Blue into each layer. When I had reached Magic Blue I started mixing in some VGC Dead white instead. I didn't get quite as smooth transition of colours as I had wished for, so to tie it all together and make the transition look better, I washed the glow with two thin layers of old GW Asurmen Blue. This had the effect of dulling down the almost white glow in the middle but also making the glow a very rich blue hue. Who's to say that some YT-1300 ships hasn't had their engines modified to emit another kind of glow than the standard white/blue? At least that's my justification and I'm gonna stick with it. ^__^
After varnishing but before applying gloss varnish, I highlighted the windows with basically the same mixes as I used on the red panels. I figured that the windows needed something more than just basic grey so the spot colour of Terracotta formed a good highlight.
And that's how I painted the ship. I hope you enjoyed this and that it has inspired you, the reader, to do something awesome as well. Until next time!
Very NICE!
ReplyDeleteawesome!
ReplyDelete